
Some of our customers choose to use G Suite for their email accounts on their web hosting packages with us.
They actually started out offering it for free, which was a great deal, but now offer it for $5 per month, per user.
Regardless, it's still a great platform, and I want to show you how to correctly configure your NameHero account to use it!
Step 1: Setup Your Account At Google
We are not G Suite Resellers as they provide very limited access to the back-end, making it a support nightmare.
Therefore we recommend going directly to Google's G Suite page, and signing up directly with them.
They have a full functioning free trial for 14 days, which allows you to make a decision if it's going to work for your business or not.
Once you have signed-up, you just need to edit your mailer exchange records at Hogan Design Group to move the email over to Google.
Step 2: Modify Your Email Routing
Before we setup the mailer exchange records, we want to tell cPanel we're not longer going to be using it for email. This helps the system prioritize where the email is going to go.
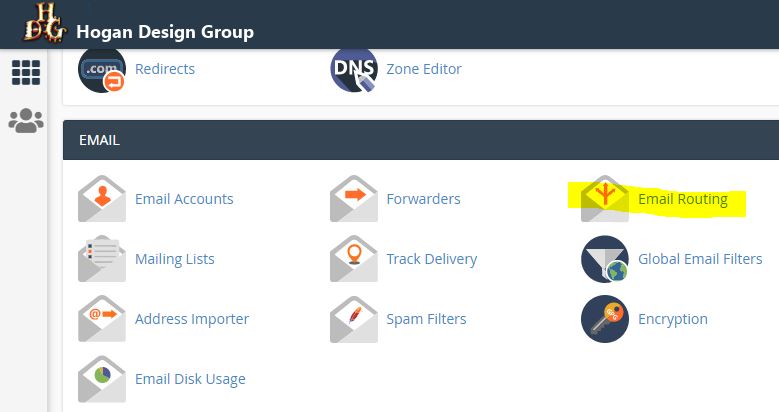
Login to cPanel for the domain you're wanting to modify and click on Email Routing:
From here, you want to change it from Automatically Detect Configuration : Local (recommended) to Remote Mail Exchanger:
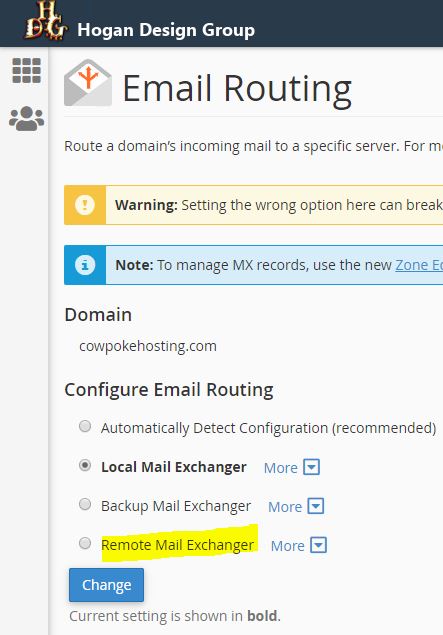
Once you've selected it, click on Change and you're ready to modify the mailer exchange records.
Step 3: Modify Your Mail Exchanger Records (MX Records)
This step is going to remove your local (Hogan Design Group) MX records and replace them with Google's.
Once you do this, your email will no longer be handled by Hogan Design Group.
This includes all email accounts, mail forwards, auto responders, etc.
Going forward, all of these items will need to be setup directly inside G Suite's interface.
To change these records, go back to cPanel -> Zone Editor:
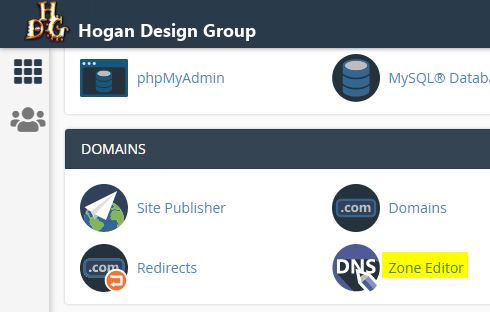
You can then click the +MX Record to add all of G Suite's MX record values:

You want to add all five, with priority 1 first, followed by the destination WITHOUT the trailing period (.):
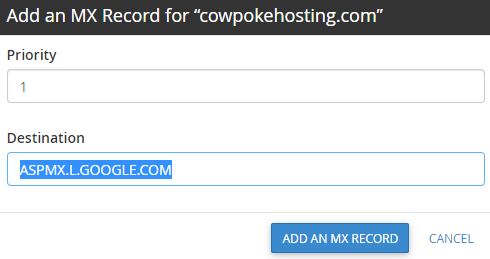
Repeat this process until all five are added.
Once finished, you need to remove the default MX record.
You can do this by clicking on Manage:

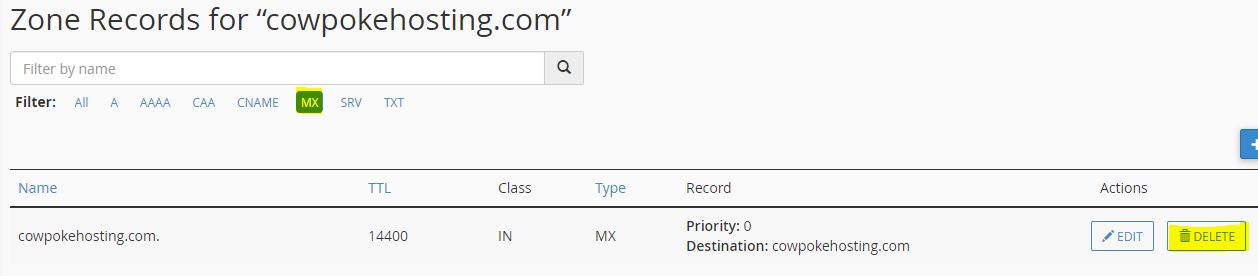
I like to click on the MX filter, so I only see those records.
Then you want to click the Delete beside the default MX record (Priority: 0):
Once you've completed these steps, G Suite should be setup successfully, but I also like to double check.
Step 4: Check Your DNS Records
Use this free DNS report tool called DNSHero.
Whenever you edit your DNS records, it's always a good idea to check this report to make sure there isn't any red showing.
To begin, simply enter your domain and click Report:

Under the MX section you should see the new entries you just created from Google:

If yours looks similar; then you're ready to begin using G Suite!
